-
Shop
- Adidas
- Advanced Technologies
- Bathroom
- Best-Sellers
- Car Accessories
- Dating & Social Skills
- Digital Resources
- AI & Technology
- AI Skills
- Beauty
- Budgeting & Saving
- Car Buying & Ownership
- Cozy Feast Collection
- Electronics & Technology
- Emotional Intelligence
- Entrepreneurship & Business Growth
- Financial Education
- Financial Independence
- Financial Mindset & Psychology
- Goal Setting
- Home Styling & Organization
- Kitchen & Recipes
- Leadership
- Mindfulness
- Mindset
- Motivation
- Online Business
- Parenting & Child Development
- Personal Style & Fashion
- Pet Lifestyle & Wellness
- Positive Thinking
- Productivity
- Self Confidence
- Sleep Improvement
- Smart Life with AI
- Stress Management & Relaxation
- Travel Planning
- Wellness
- Yoga & Fitness
- Yoga & Mind-Body Practices
- Easter Products
- Education & Learning
- Family & Parenting
- Fashion
- Alexander McQueen
- Bags
- Bags & Wallets
- Balenciaga
- Belts
- Blazers
- Bottega Veneta
- Brunello Cucinelli
- Burberry
- Chanel
- Chloé
- Dior
- Dolce & Gabbana
- Dresses
- Etro
- Fendi
- Gucci
- Hats & Hair Accessories
- Jewelry
- Jil Sander
- Keychains
- Kiton
- Luggage
- Miu Miu
- Off-White
- Outerwear
- Prada
- Rick Owens
- Saint Laurent
- Shoes
- Socks & Tights
- The Row
- Tom Ford
- Valentino
- Valentino Garavani
- Versace
- Vivienne Westwood
- Watches
- Furniture
- Gadgets
- Health & Beauty
- Health & Wellness
- Home & Garden
- Home Electronics
- Kids & Babies
- Kitchen
- Lighting
- Patio, Lawn & Garden
- Personal Growth
- Pet Care
- Pet Supplies
- Pets
- Smart Home Living Guides
- Sport & Outdoors
- Stress Relief & Relaxation
- TikTok Growth & Monetization Mastery
- Travel
- Wealth
- Wealth Building
- Popular
- Best deals
Marble Fire Highlight Brush: Smooth, Targeted Glow Tips
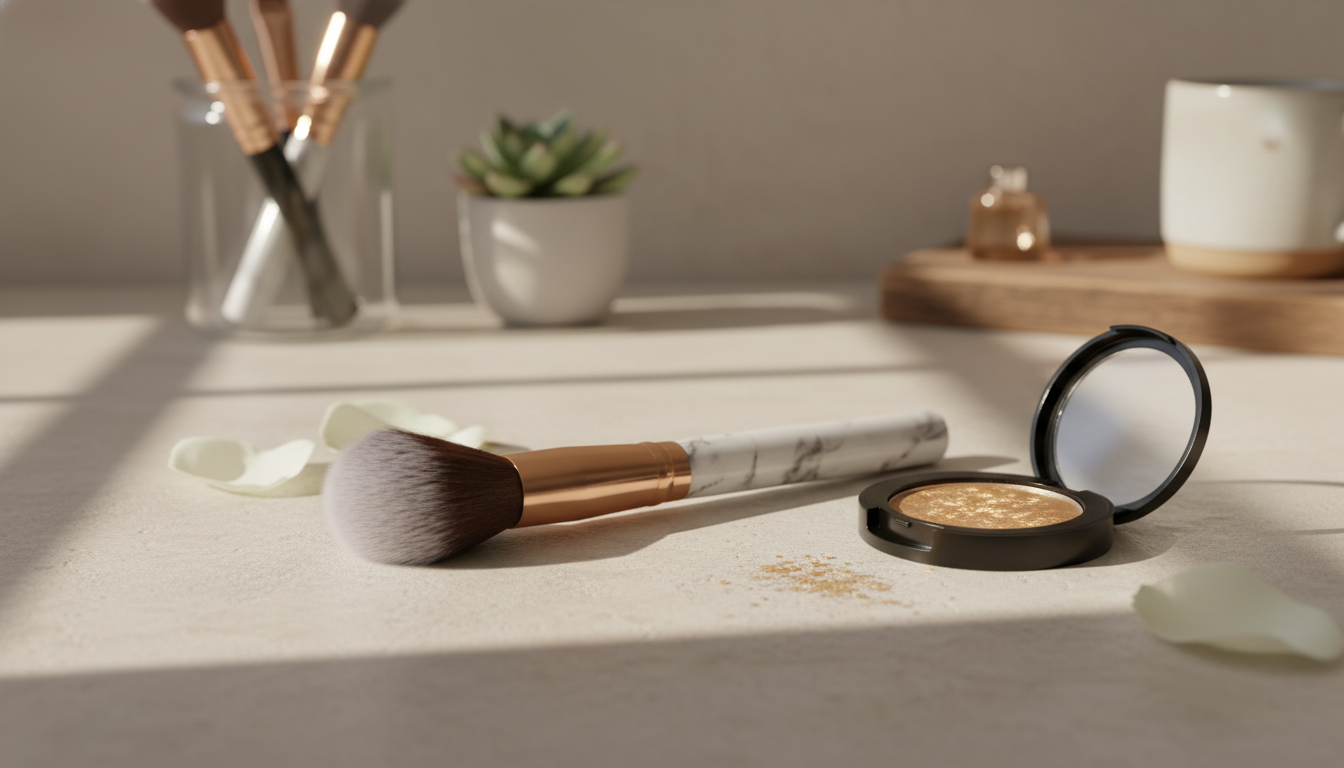
Marble Fire Highlighting Makeup Brush: How to Get a Smooth, Targeted Glow
A highlighting brush can be the difference between a soft, lit-from-within sheen and a noticeable stripe of shimmer. The right brush shape helps you place glow exactly where light hits—then blend the edges so it looks like skin, not makeup. Below is a practical guide to what a highlight brush is designed to do, how to use it for everyday radiance or a higher-impact reflective finish, and how to keep bristles performing smoothly over time—plus quick details on the Marble Fire Highlighting Makeup Brush and where it fits into a simple routine. For more guidance, see Single Marble Makeup Brush Pattern Flame Repairing Highlight ….
What this brush is designed to do
A dedicated highlighting brush is all about control. Instead of sweeping product broadly (which can turn glow into shine), it helps concentrate shimmer on specific points and softly fade the edges. For further reading, see My Nyx Collection – Porcelain | Amanda’s Pages.
- Applies highlighter precisely to high points of the face (cheekbones, bridge of nose, cupid’s bow, brow bone).
- Helps control payoff so shimmer can be built gradually rather than landing in one concentrated patch.
- Works with powder highlighters and can also be used for finishing powder on small areas.
Marble Fire Highlighting Makeup Brush: quick details
If you’re experimenting with highlight placement, brush pressure, or different finishes, a budget-friendly brush can make practice easier—especially when you want a tool that’s dedicated to glow (so it doesn’t pick up leftover bronzer or blush pigment).
- Product page: Marble Fire Highlighting Makeup Brush (in stock).
- A budget-friendly option for experimenting with highlight placement and intensity.
- Visually distinctive handle design that’s easy to spot in a brush cup or travel pouch.
| Detail | What to know |
|---|---|
| Product | Marble Fire Highlighting Makeup Brush |
| Price | $3.01 USD |
| Availability | In stock |
| Best for | Targeted highlight application and soft blending |
How to get a natural glow (everyday technique)
For an everyday finish, the goal is to mimic the way light naturally hits skin—no obvious edges, no glitter “specks,” and no sudden shift in texture.
- Prep first: apply base makeup and set where needed before adding highlight (especially on textured or oily areas).
- Tap, don’t swipe: pick up a small amount of product, tap off excess, then place on the cheekbone high point.
- Blend outward: use light, short strokes to diffuse edges toward the temple for a seamless finish.
- Build slowly: add a second thin layer only where light naturally hits, rather than expanding the highlighted area.
Helpful checkpoint: tilt your head slightly and look for the natural “peak” of the cheekbone. Placing product just on that ridge keeps the glow lifted and avoids emphasizing the center of the cheek.
How to create a more intense, reflective finish
For a more reflective look, technique matters as much as formula. Small adjustments—like layering and placement—help you get impact without turning highlight into a harsh stripe.
- Use a slightly tacky base: a set-but-not-powder-dry cheek area can grip shimmer for higher impact.
- Layer strategically: apply a thin veil first, then concentrate a second layer on the highest point of the cheekbone.
- Aim for symmetry: step back and check both sides under the same lighting to avoid uneven placement.
- Keep texture in mind: if pores or fine lines are emphasized, move the highlight slightly higher and more outward.
If you want a crisp, “beam” effect, keep the placement narrower and resist over-blending downward. Instead, blend mostly up and out toward the hairline.
Placement map: where highlight looks most flattering
Placement is what makes highlight look intentional. These zones tend to flatter most face shapes, with small tweaks based on texture and undertone.
| Area | Effect | Application tip |
|---|---|---|
| Top of cheekbone | Lift + glow | Place on the highest point, blend toward temple |
| Bridge of nose (center) | Soft dimension | Use the least product; keep it narrow |
| Cupid’s bow | Fuller-looking lips | Tap lightly; avoid shimmer on upper-lip texture |
| Brow bone | Brightens eyes | Use a satin finish for the most natural look |
Choosing the right highlighter formula for this brush
Cleaning and care for better performance
Clean bristles pick up product more evenly, blend with less effort, and are less likely to transfer old pigment onto fresh makeup. For brush hygiene guidance, the American Academy of Dermatology Association shares practical steps for washing makeup tools (AAD: How to clean makeup brushes). It’s also useful to understand general cosmetic safety guidance from the U.S. Food & Drug Administration.
Common mistakes and simple fixes
Who this brush suits best
More in-stock picks to round out a simple kit
- Marble Fire Highlighting Makeup Brush (a dedicated tool for controlled highlight placement).
- Social Confidence in Any Situation (Printable Checklist) (a quick, practical download for getting ready with less second-guessing).
- Brunello Cucinelli Women’s Cashmere T-Shirt with Glitter Effect (a polished, subtle-sparkle wardrobe piece to complement luminous makeup).
FAQ
Can this brush be used for more than highlighter?
Yes. Depending on the brush’s size and density, it can also work for targeted setting powder (like under the eyes), a light sweep of blush on smaller cheek areas, or precise bronzer on the nose and temples.
How often should a highlighting brush be cleaned?
For regular use, a weekly wash is a solid baseline, with quick cleaning between shades to keep shimmer from turning muddy. Clean more often if you’re acne-prone or using cream/liquid products that leave more residue.
Why does highlighter sometimes look like a stripe?
A stripe usually comes from using too much product, pressing too hard, applying over a base that isn’t set evenly, or skipping edge blending. Use lighter pressure, tap off excess, and finish with a clean buffing pass to soften the border.
Recommended for you



Kiton Pointed-Toe Mesh Sneakers: Sleek Lace-Up Fit
May 18, 2026
Lead With Fire: Motivate Teams Without Micromanaging
May 18, 2026










Leave a comment